Unfortunately, this Minecraft PE skin not can be done without tampering with the game code. But I am sure that you yourself want to create the same on your skin and repeat my experiment. Well, let's get started. To start, we need such programs as:
Apk Editor (I prefer it, but you can use the analogue)
Drawing program skins. I use Skin Toolkit for Minecraft due to its simplicity and adequate functionality.
Blank for skin.
File with code.
File Manager. At least ES file Explorer, but it is sure we need.
This (except the last one in the list of programs) you can download in zip files.
Detailed instructions:
Download the archive and install the necessary software. Be sure to save yourself a file with the code and Blank of the skin.
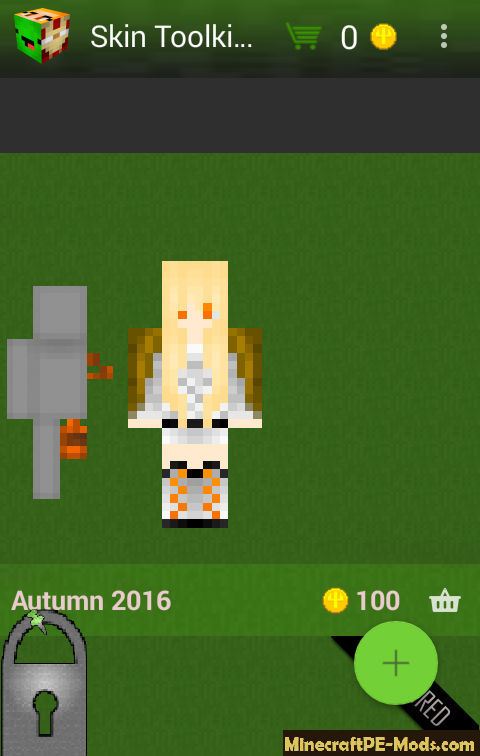
Go to the drawing program skins. As I said, examples are on Skin Toolkit for Minecraft.
Click on the green "plus", select import from file and looking for a blank for a skin.
Then repeat point 3 but this time search for your skin.
Open blank
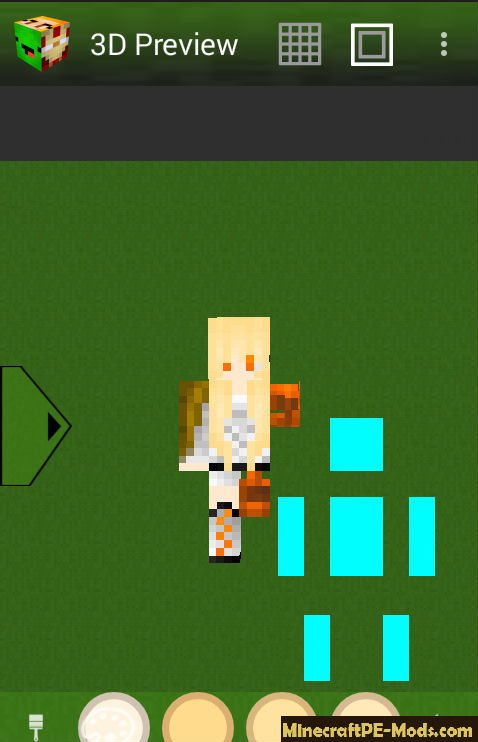
Now it will not be easy to explain, so I will gradually make a screen for every action.
Press the green arrow to the left -> tap on the left hand on the blue scan and model it on your skin. Similarly with the left leg, body and head. It may look strange, but if it's like this you are on the right track.
Exit to the main menu and hold down on the skin -> Choose Save to file and save in the required folder.
The hard work is done. Now open ApkEditor.
If you have Minecraft already installed — look for it in the item Select apk from app. If you only downloaded — in the items Choose APK file.
Choose from the list and click on Replace files.
Click on Assets.
Find the folder JTTW which is located on the way assets -> Resoursepacks -> Skins -> Skinpacks -> JTTW
Finding it looking for the file JTTW.json and click on the pencil icon on the folder. Look for a file with code that was originally in our files. If you did the right thing, he re signed up under us.
Further change in the same way files guanyin_slim.png and Red_Boy on our made skin.
Ready! Click on save. Then demolish the old Minecraft (if it was) and install a new one.
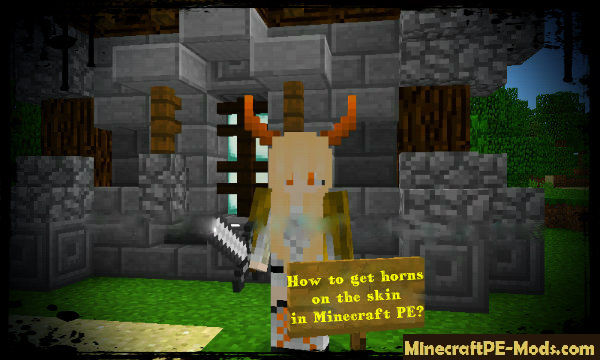
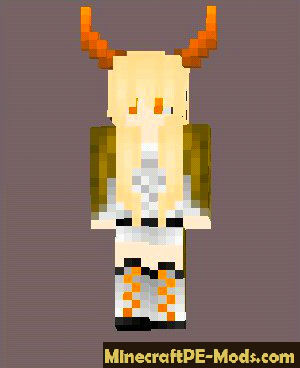
And if you did everything correctly, you get this:
I am a professional from Minecraft PE Team that creates and publishes the best content for Minecraft players. We have been studying custom gameplay, modding features, as well as popular game themes for a long time. You can be sure that our materials are designed for the player to spend more time in the game world than usual. Additionally, our modifications will allow you to turn your game into absolutely any other theme. I'm also a pretty good player, so I'll try to answer any of the questions in the comments.